
Video Workbench Guide (Video Director)
Arrange character motions and actor tracks, adjust weapons and the scene camera, then export PNG frames, MP4 video or eight-direction frame ZIPs.
The Video Workbench entry is named Video Director. It arranges existing 3D motions and captures the viewport. AI Video on the canvas is a separate generation tool.
1. Open Video Director
Open an AI Studio project and choose Video Director in the canvas creation toolbar. The motion library is on the left, viewport in the center, actor and weapon properties on the right, timeline below, and export controls at the top.
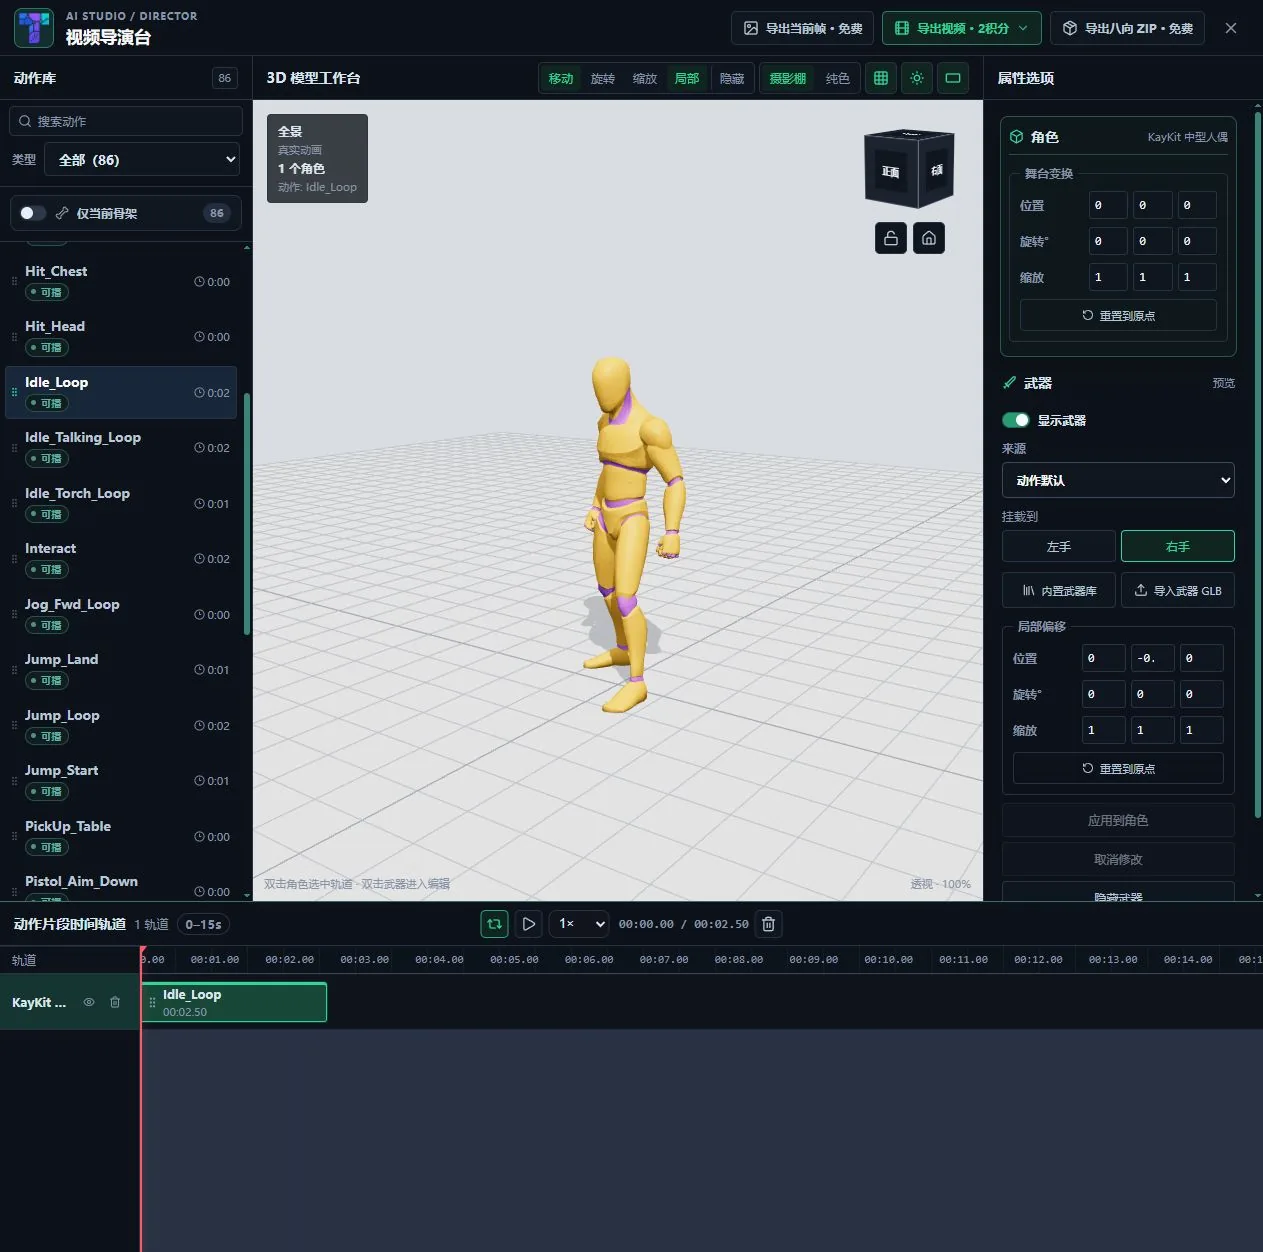
2. Add motions and actors
Search by name or filter by motion type. Double-click a motion or drag it onto the timeline or scene. Begin with an idle motion and let the actor finish loading before adding more.
- Each actor has one track. Motions with matching character and skeleton join an existing actor; other motions create an actor when capacity allows.
- The scene supports up to five actors, including hidden actors. Delete a track to free a slot.
- The library initially shows all motions. Select an actor to optionally filter by the current skeleton.
- Double-click an actor in the viewport or select its track before editing its properties.
3. Arrange and preview the timeline
Add consecutive motions to a track, drag clips to reorder them, and scrub the playhead to inspect transitions. Use playback, loop and playback speed to review timing and actor overlap.
4. Set transforms, weapons and framing
- Select an actor and use transform handles or inspector values. W/E/R select move, rotate and scale; Q toggles local/world space.
- Use the view cube, camera reset and lock controls to frame the whole scene. Check that every required actor fits in the shot.
- Review studio/solid backgrounds, grid, shadows and floor visibility.
- Select a built-in weapon or import a GLB. Adjust the hand, local offset, rotation and scale, then apply to the actor. Custom weapons remain browser-local; keep your source files.
5. Export your result
- Current frame: stop at the intended time and download the viewport as PNG.
- Export video → local: download an MP4 covering the timeline through the final clip end.
- Export video → canvas: place the same MP4 in the host project as a video node. Both destinations use the same credit price.
- Eight-direction ZIP: export one transparent PNG of the current pose per direction, plus manifest.json. This does not export a full animated frame sequence.
All exports require workbench access. With access, PNG and eight-direction exports do not spend credits; MP4 pricing follows the current menu. Check the price and keep the page open until export finishes.
Troubleshooting and delivery checks
If export is disabled, check for motions, loaded actors or an export already running. Retry network errors in the motion library. If MP4 encoding is unsupported, use a desktop browser supporting H.264 encoding. Check playback, duration and framing after downloading; inspect all eight direction folders, PNG images and the manifest in ZIP exports.